


In this how to make Future House tutorial, we are going to go over how to get that Tchami & Oliver Heldens. We are going to break this down into 4 parts, so you can get a solid understanding of what makes up a Future House track.
*Listen Before Reading On
1. Main Pluck Layering
Future House Music would not be complete without the main pluck. This pluck is the foundation for the genre and is the first element to go over in this how to make Future House tutorial.
To get that metallic pluck sound, it comes down to layering synths.
We are now going to go over the synth programming and processing involved in the 6 different layers that make up this metallic pluck.
** For this Future House tutorial, a majority of these layers will be created using Xfer Serum **
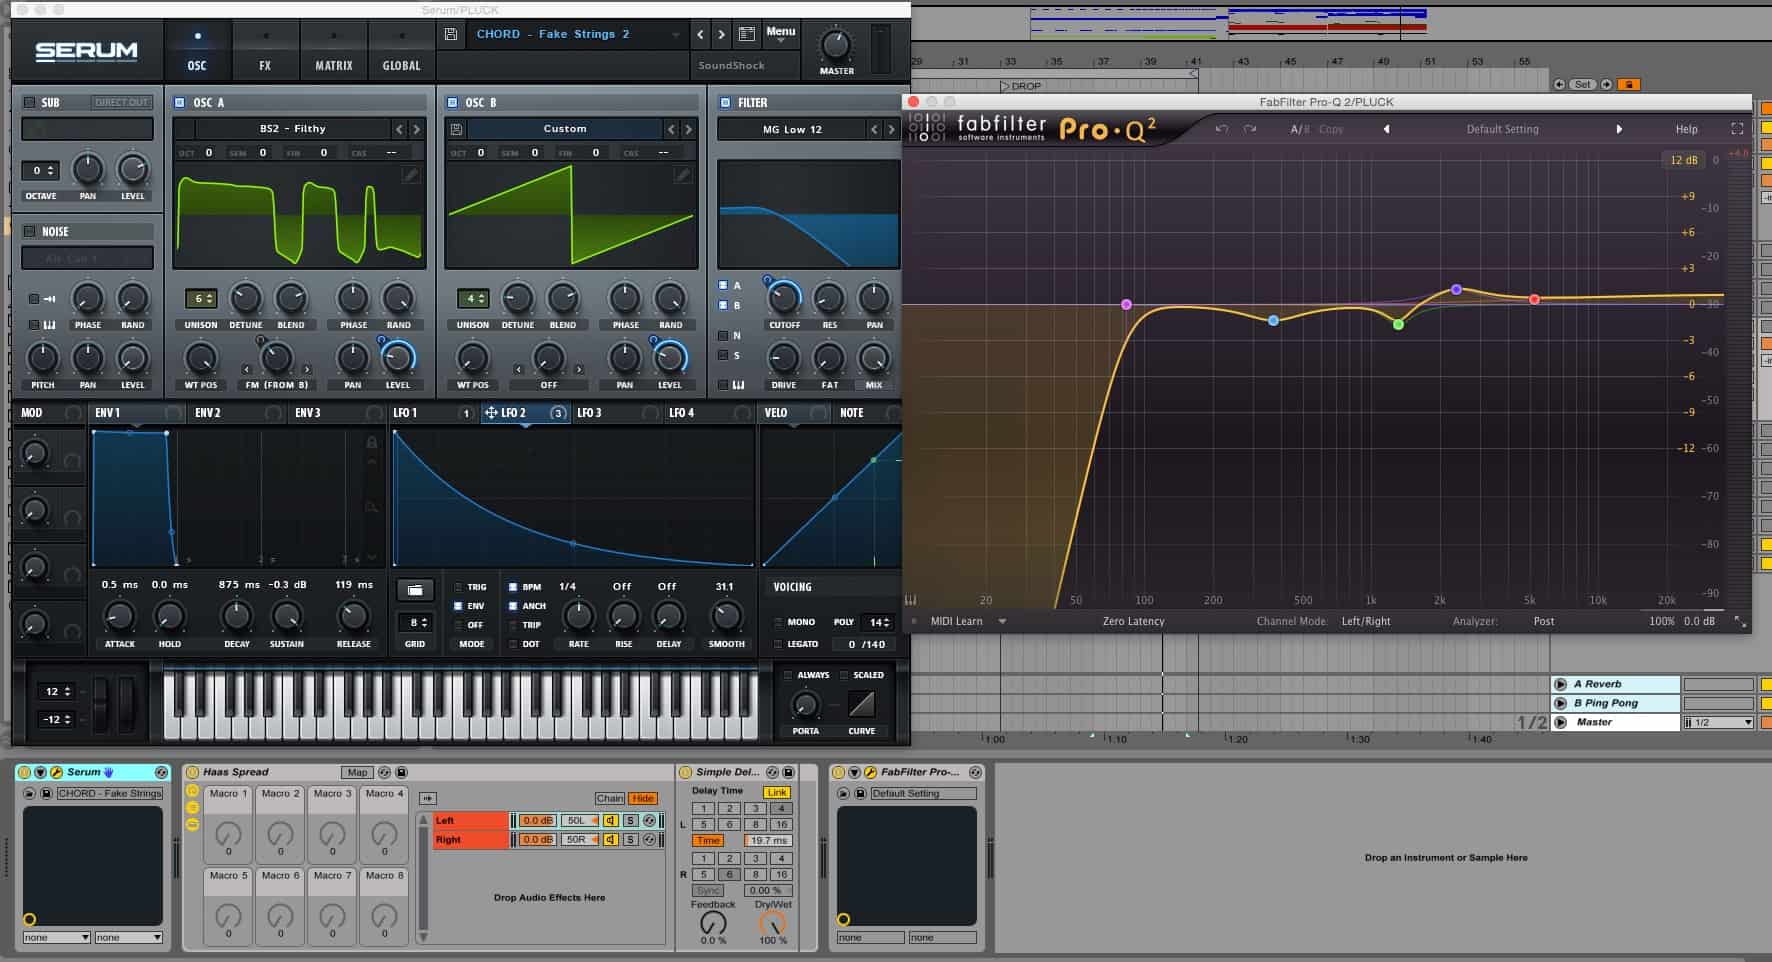
Main Layer:
Our main layer is going to lay the foundation for the sound so we want to make sure that the timbre of the sound gives that funky plunk sound.
We used Xfer Serum for this sound as it is easy to modulate and mold the sound to what we want.
The foundation of our sound is a saw wave and squarish wave with a quick decaying envelope on the amp and cutoff of the sound. To add a little added a little FM modulation as well to OSC A.
New To FM Synthesis? Learn The Basics Of FM Synthesis
For the processing of the sound outside the synth, we use the Haas Spread Trick.
Next we put on an EQ to dip out some mud in the 375 range and boost the highs.
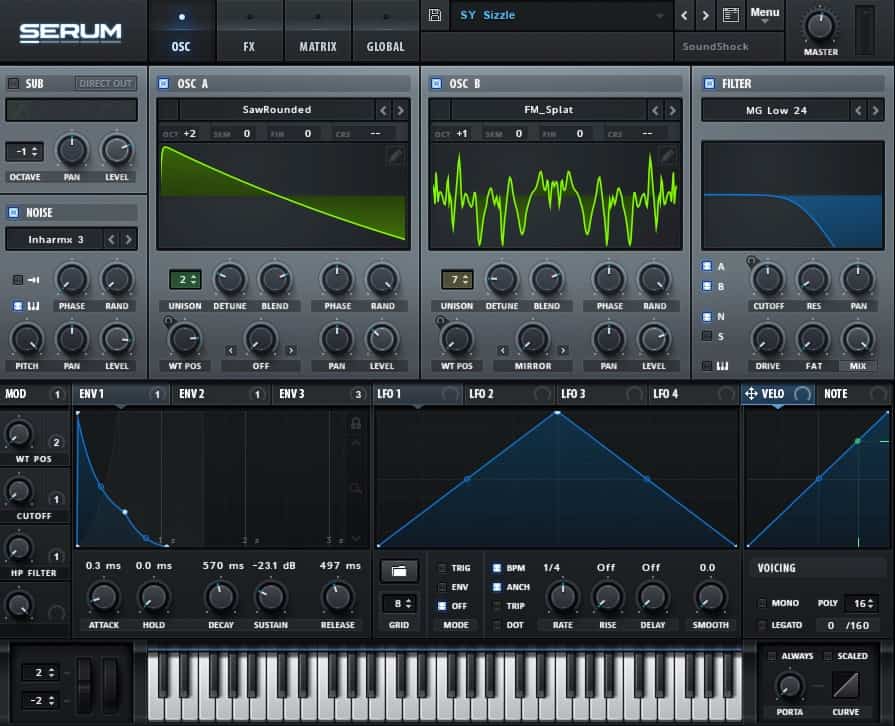
Supporting Pluck Layer:
Next we want to add more bite and sizzle to the sound so we add another serum with wavetables that contain lots of harmonic content.
We follow this with more EQing to clean up and brighten the sound.

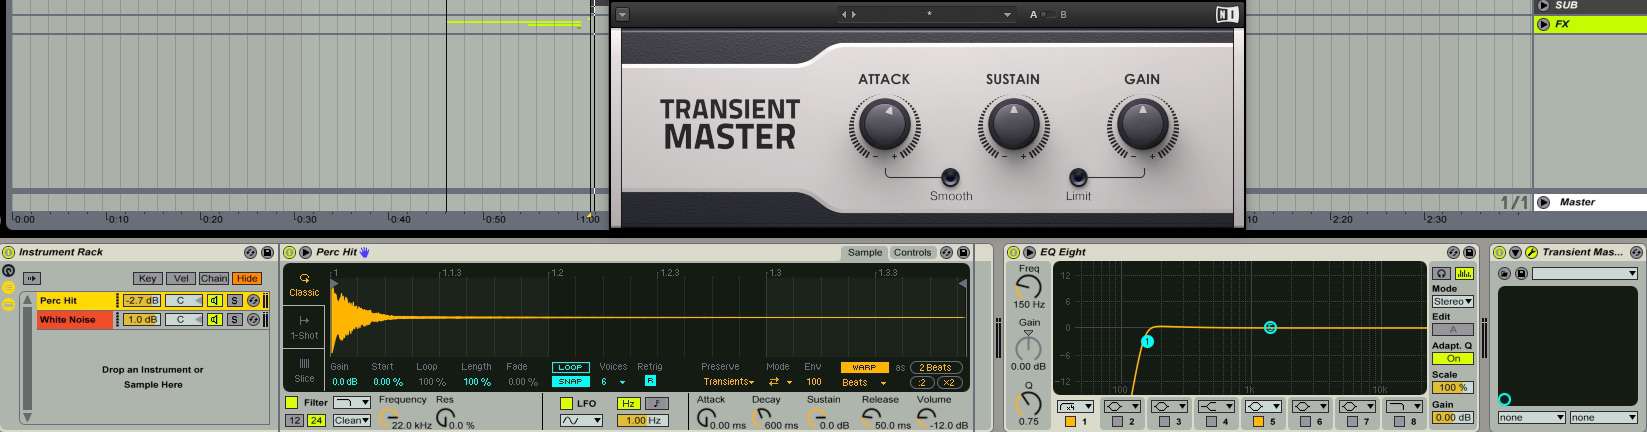
Character Layer:
To give the sound a little more character and dimension, we add a recorded percussion sound and tune the sample so we can play it like it was part of the pluck.
To add some more sizzle and presence to the perc hit, we load up an operator and change the output to white noise and play this along with the percussion.
We process both of these with a low cut at 150 HZ and Native Instruments transient master to add extra attack to the sound.
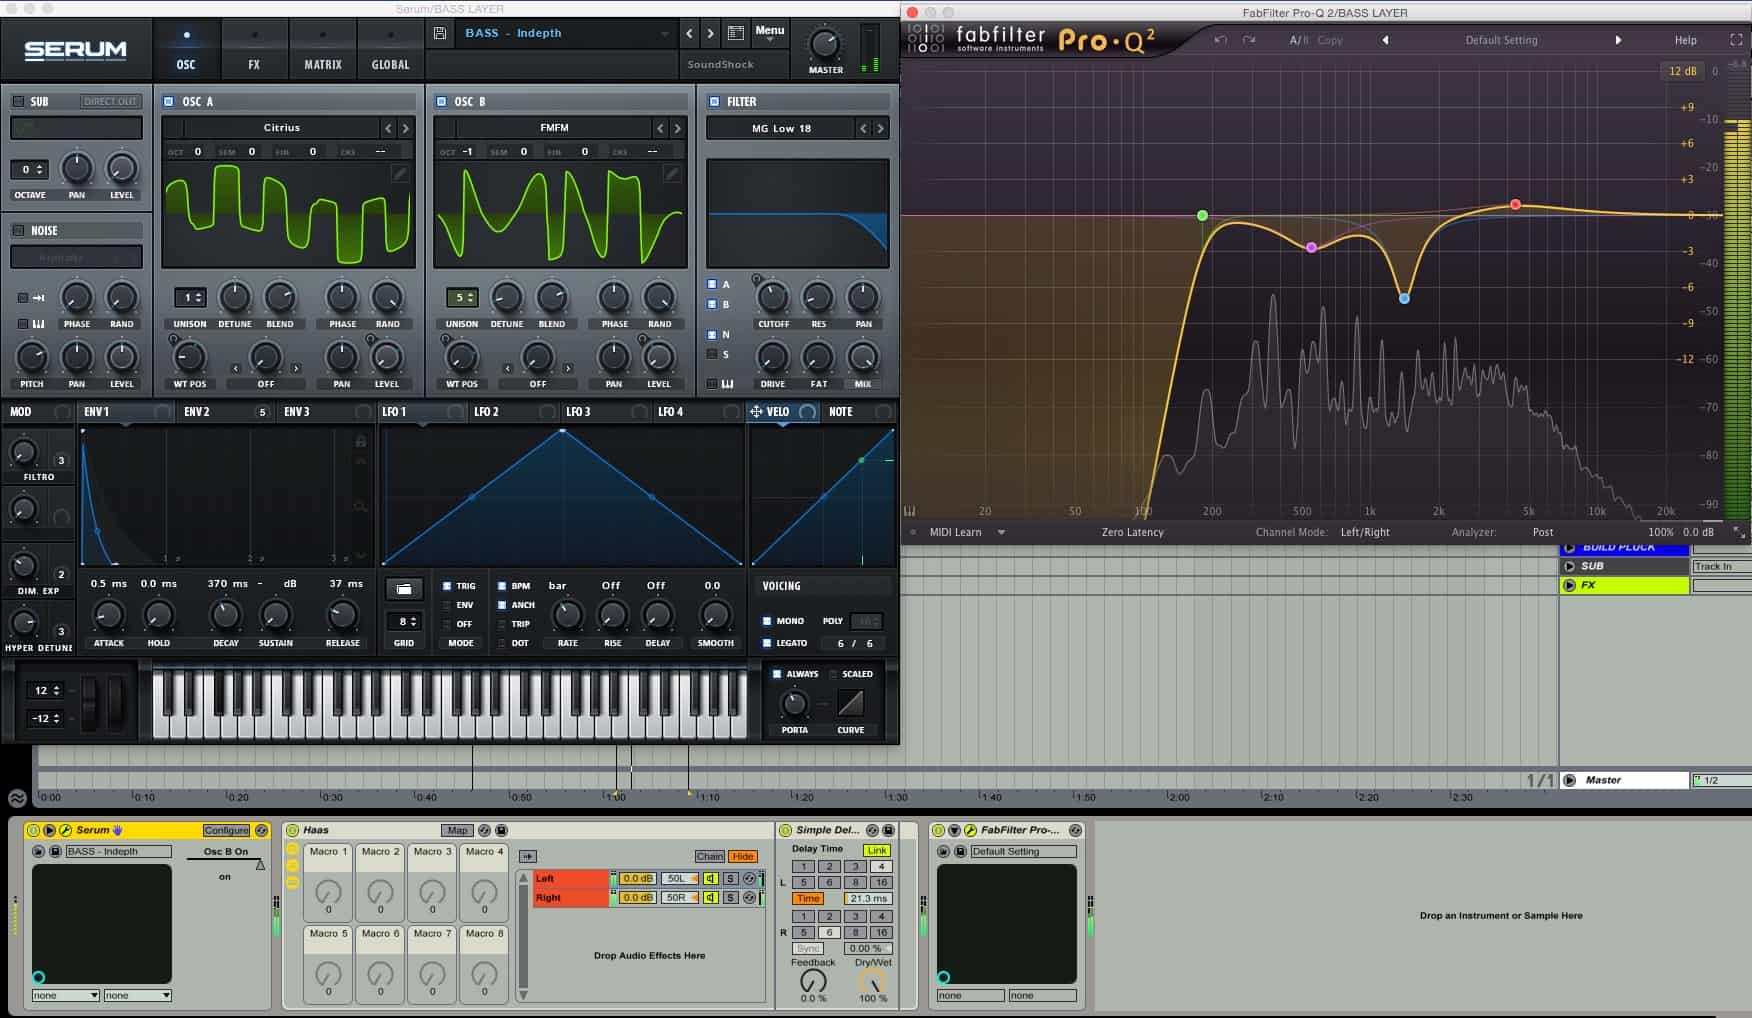
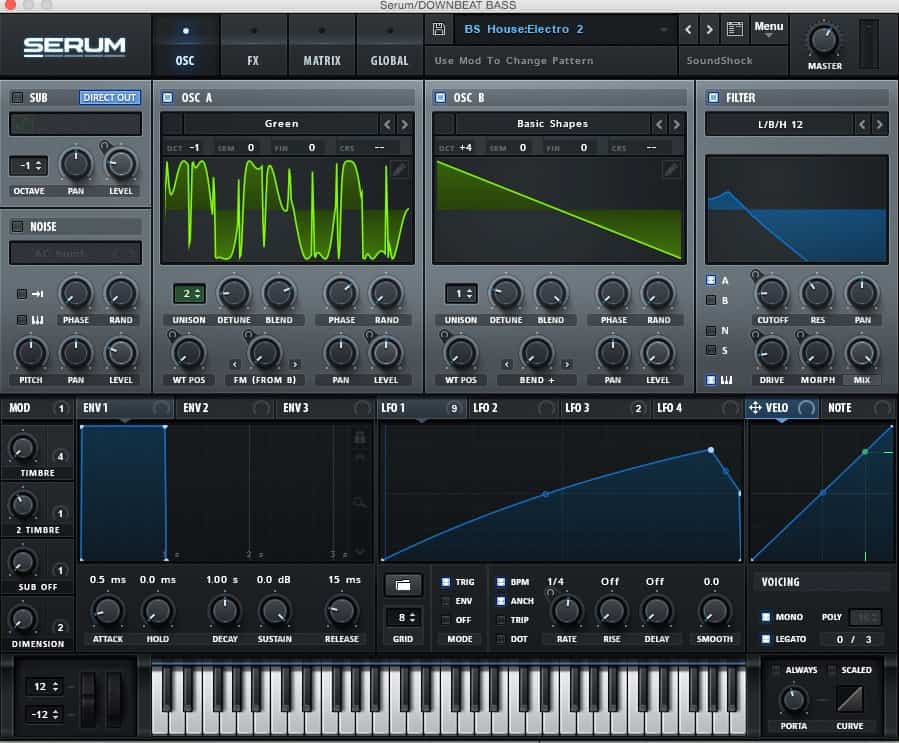
Bass Layer:
We want our bass layer to blend well with our other plucks so loaded up another Serum and set the waves to saw and a synced saw for that extra funky feel.
Next we put envelopes on the filter and amp to give the pluck.
And of course, we finished this up by throwing on an Eq and making small, cleaning and brightening adjustments.
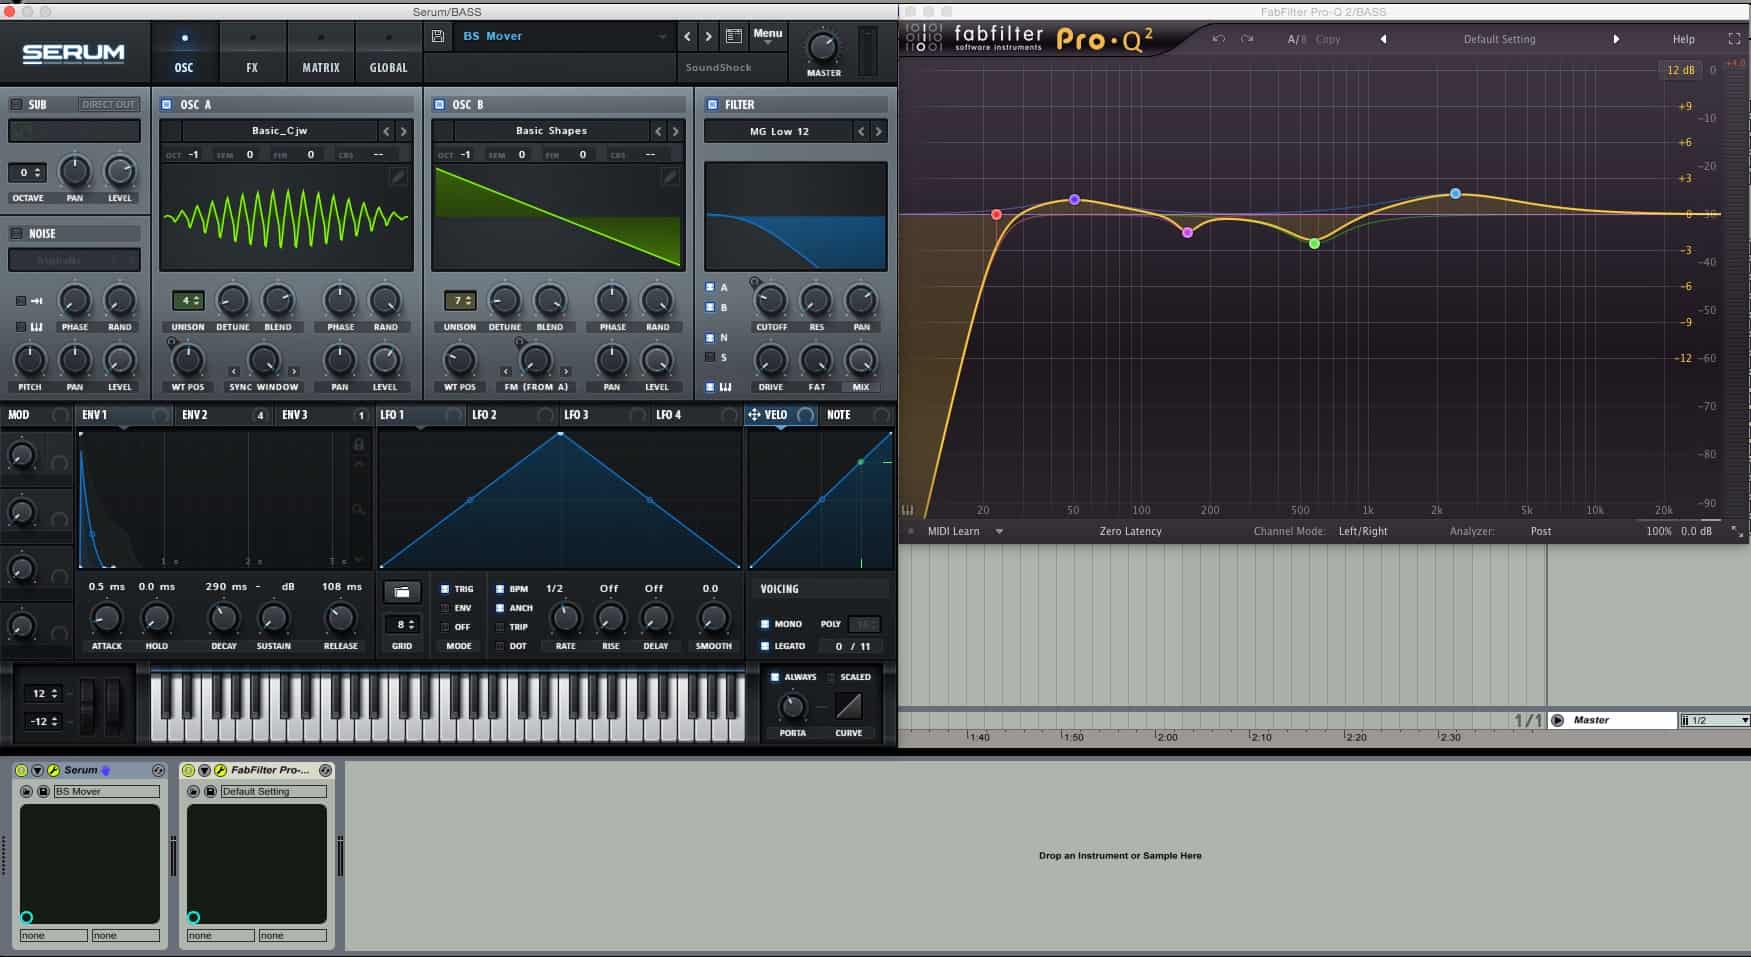
2nd Bass Layer:
We felt there could be more movement and character in the mid bass range, so we added a bubbly bass layer.
We loaded up Serum and chose simple waves without too much complex harmonic content to achieve this.
Next we set the amp and filter envelopes to get the pluck sound. To give the bass a three dimensional feel and to have it surround our other bass layer, we did our Haas delay processing trick and finished it off with some EQing.
It is important to mention that for our bass layers we only used the root note of each chord for the midi.
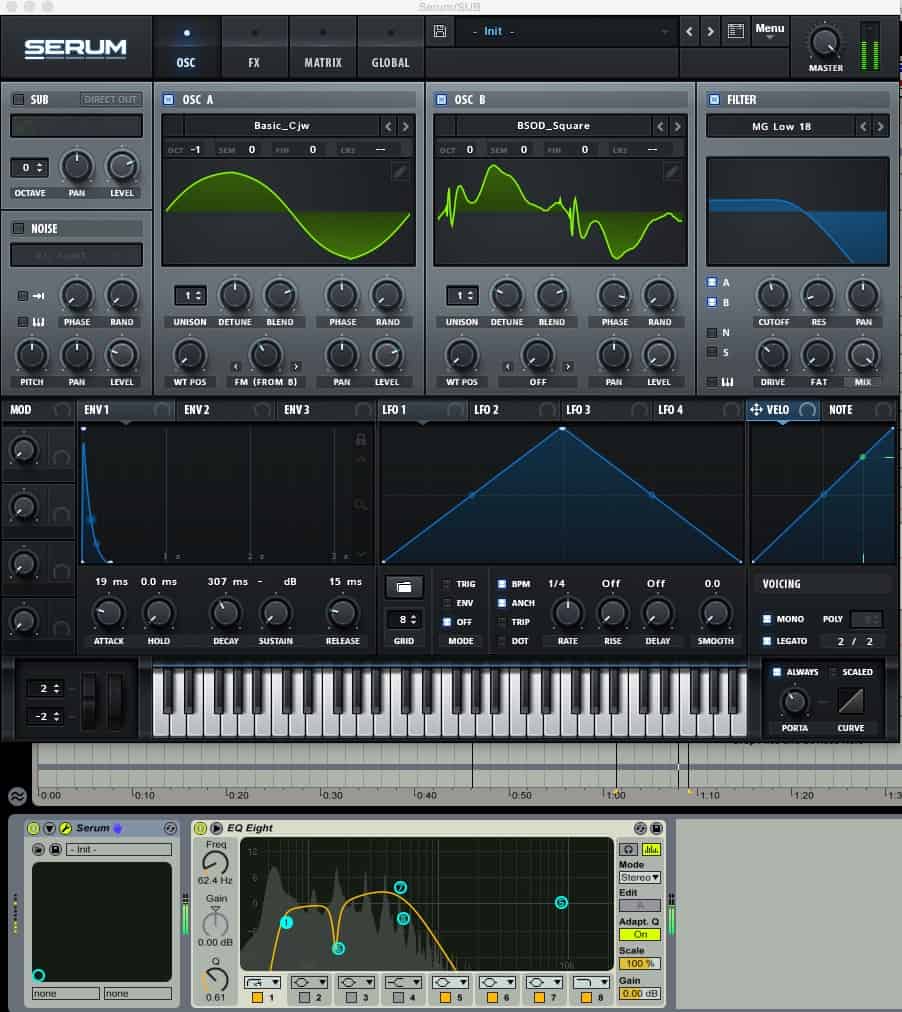
Sub:
Finally we have the sub.
We wanted this sub to have a little extra character so in our serum patch, we used a sine wave and frequency modulated it with a complex waveform to give it more bounce and bite.
Next, we put on an EQ cleaning up some of the mud and put on a low cut up to 62 Hz as we chose to have the kick playing in that 30 – 60 Hz range as it gelled better with the track.
2. Supporting Basses and Synths
When learning how to make Future House, the supporting synths and basses are often overlooked. For our supporting bass, we wanted a nice low growly synth that sucked you into the pluck melody.
For the sound itself, we used one oscillator to output the sound, which is a frequency modulated harmonically rich buzzing wave. We were able to get the sucking sound that we were going for by using an upward ramping saw wave to modulate the amount of frequency modulation, the amplitude, and the cutoff of the filter.
We needed to add a bit more interest and space in the mix, so we decided to add a reverberated pluck hit.
We used a saw wave to give the pluck weight and a harmonically rich wave for high-end character.
To get that long shimmering reverb tail, we made sure to put our reverb before the OTT multi-band compression so all the detail of the reverb would be present in the mix.
Finally we added a simple high- pitched saw pad that comes in after 4 bars to fill out the mix a bit more and give the feeling of progression.
3. Midi Sequencing and Arrangement
Next up on our how to make Future House tutorial is the midi sequencing and arrangement of your pluck and supporting sounds.
Creating our pluck progression and sequencing it is pretty straight forward.
For Future House music, we mainly want to use minor keys here as they will provide the necessary dark and slightly happy mood that the genre embodies.
For our example, we wrote the progression in F# minor.
One secret trick that we use when writing our Future House drops is to use Suspended Chords.
This helps give that nice dissonant and dark vibe to the progression that your straight forward chords don’t provide.
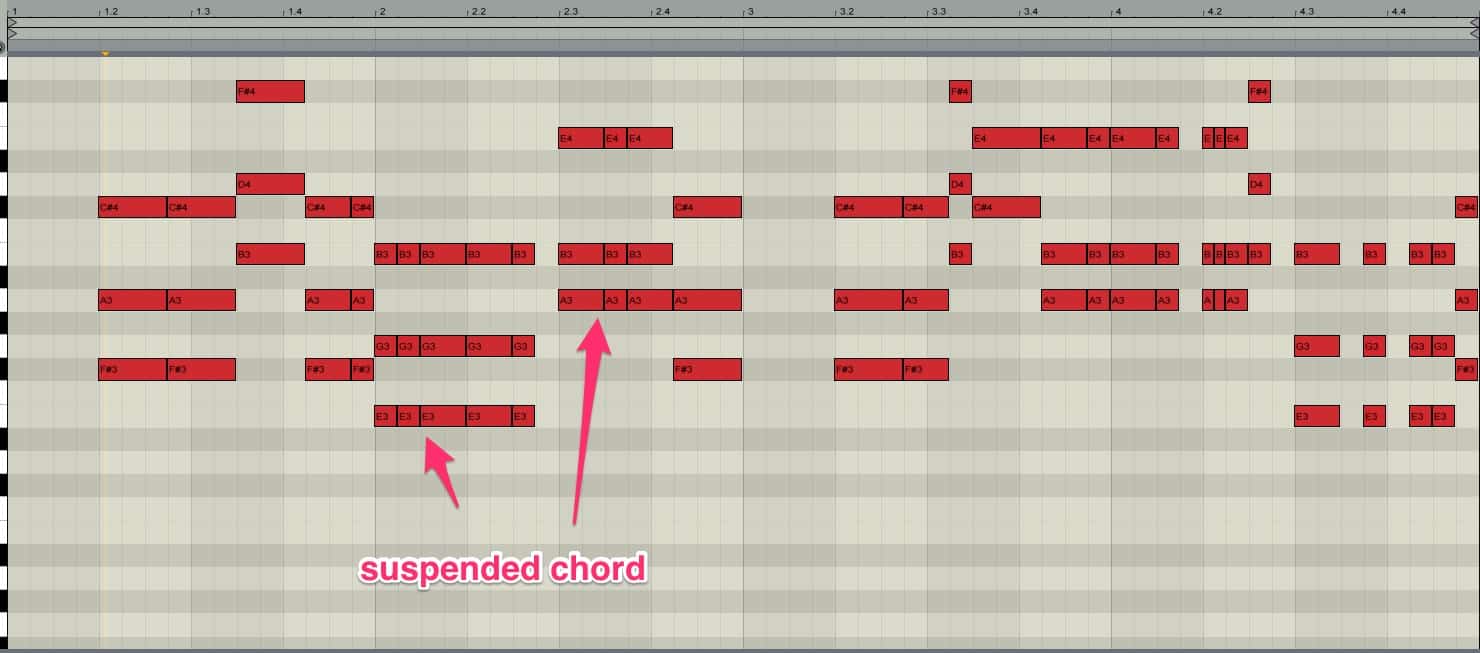
Future House drops rely on quick and frequent pluck stabs, so we made sure to add a fair amount of 1/16 and 1/32 note chord stabs to give the pluck plenty of movement and speed.
Another secret trick that we used to increase the sense of urgency and speed of the pluck was to move all the midi notes slightly forward in time, so they will be playing slightly ahead of the drums and create a quicker pace.
Our supporting bass, placed on the downbeat, gives a break and creates tension between the main pluck element.
Also, we felt there needed to be more interest in the background so we chose to put the reverb pluck in on the 2nd beat (right after the downbeat bass) every 4 bars as it gives the listener more momentum into the pluck melody and gives the track a nice shimmer
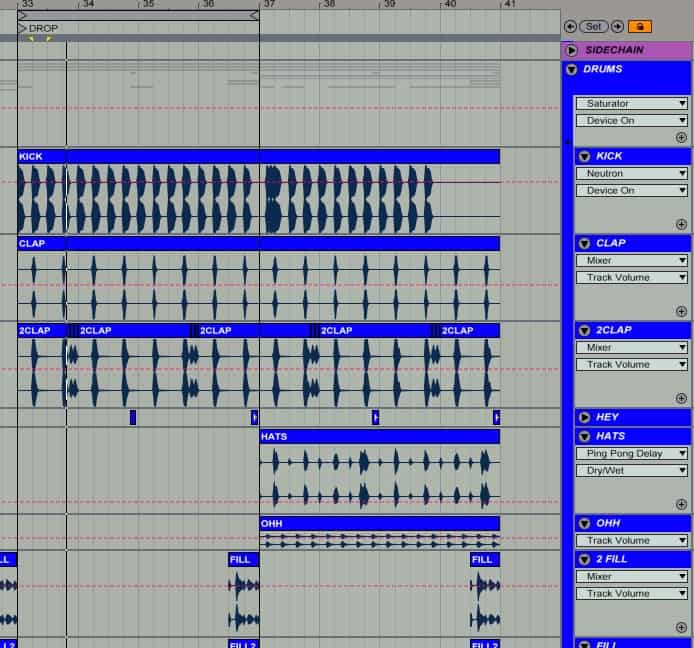
4. Drums
Finally, what how to make Future House tutorial would be complete without going over the drums.
Our drums use the standard House beat.
A kick every quarter note, a clap/snare every 2nd and 4th beat, an off beat high hat that comes in halfway through the drop, accent high hats, and live drum fills.
Future House makes good use of the classic House drum sound, so we chose our samples accordingly.
We used a nice thuddy kick with a clear and present high end tick on all quarter notes and put a snappy live sounding clap on the 2nd and 4th beats.
Also, we sprinkled in a live sounding drum loop with live sounding fills every 4 bars.
As the drop continues, a classic off-beat high hat comes in accompanied with subtle high hat accents.
To get the drums sounding full bodied and in your face, we used our trusty drum processing techniques, which you can learn how to do in our How To Process EDM Drums Tutorial
That concludes our deconstruction and analysis of how to make Future House!
We hope you found the in depth tips and techniques in this Future House tutorial to be useful and are inspiring! Now it is time to get into your DAW and start writing your next Future House banger!
